How to Clean a Humidifier
The removal of mineral buildup and mold is of the utmost importance when operating your humidifier.

You should perform a deep cleaning every 1-2 weeks depending on humidifier usage and overall water hardness. If possible, empty the tank daily and let it dry to prevent bacterial growth. Regular maintenance will extend your humidifier's life and ensure that it does its job correctly, time and again. And to note, it should come as no surprise that running your humidifier continuously requires more frequent cleaning than occasional use.

If you're looking for a large mist engine (our term for it) for your modern day mansion, you should check out this Large Humidifier. It will provide moisture for many rooms in your house simultaneously.
1. Humidifier Prep
Unplug your humidifier and place it on a water-resistant surface like a kitchen counter. Unplugging electrical equipment is a must when you're working with water. Also, visually inspect the humidifier for visible mineral deposits or discoloration, as these will need extra attention during cleaning.
2. Disassembly
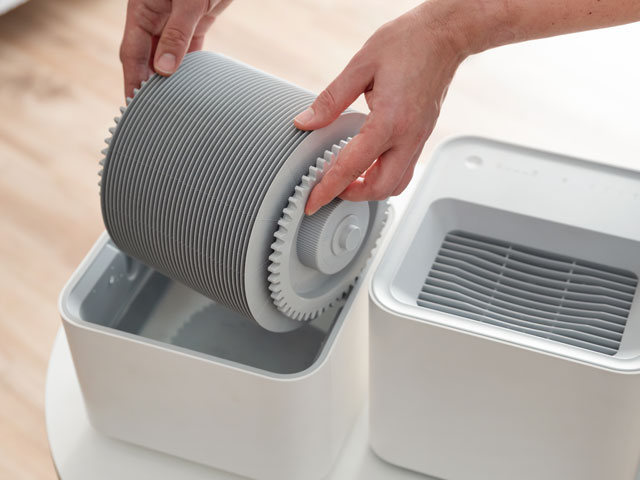
Disassemble your humidifier completely. This includes removing the tank, filter (if present), and any detachable parts like the cap and mist nozzle. Each component of the humidifier needs attention during the cleaning process.
3. The Cleaning Solution
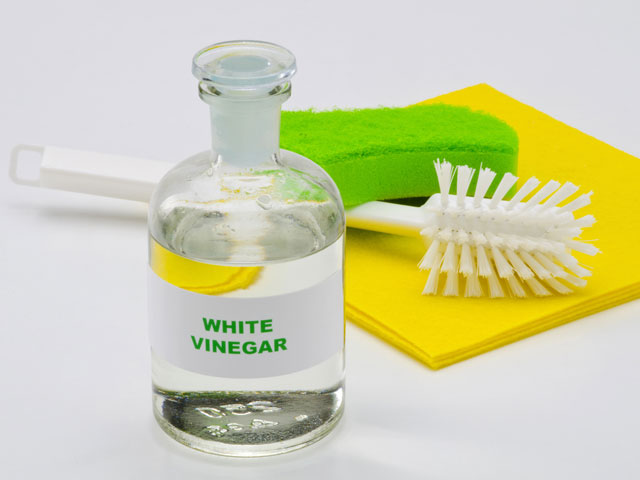
Create your cleaning solution by mixing equal parts white vinegar and warm water. The warm water helps the vinegar work more effectively by increasing the rate of the chemical reaction with mineral deposits. If your humidifier has heavy buildup, you can up the vinegar.
4. Cleaning the Base
For the base unit (where the motor is housed), pour enough of the water/vinegar solution to cover any visible scale. However, do not submerge any electrical components. Let this sit for ~30 minutes. What this will do is give the acetic acid time to break down mineral deposits and wear away any mold spores that have built up.
5. The Water Tank
For the water tank, fill it about halfway with the vinegar solution. Replace the cap and gently swish* the solution around. Make sure the solution comes in contact with all interior surfaces. You should also let this sit for the same 30-minute period.
* It's ok to give a vigorous shake if the build up is that bad. You know, the old college try. Just be sure not to damage the unit.
6. Cleaning the Parts
You can get a lot done in 30 minutes. So while your waiting, soak the small parts like the cap and mist nozzle in a bowl of vinegar solution.
7. Scrub the Base
For the base unit, use a soft brush (like an old toothbrush) to gently scrub away any loosened deposits. Pay special attention to any sensors or moving parts.
8. Scrub the Tank
Empty the tank and scrub its interior with a soft brush or cloth. If you notice any stubborn deposits, you can repeat the vinegar soak.
9. Rinse
Rinse everything thoroughly with some clean water. Do this multiple times, as you want to wash away any remaining vinegar. Trust us, you aren't interested in aerosolized vinegar getting misted back into your room.
10. Air Drying
Let all parts air dry completely. Any moisture left in the unit could promote mold growth, and then it's back to the rinse and repeat process you started in step one. Reassemble the humidifier after you let it air dry.

11. Filter Maintenance
If your humidifier has a filter, check the manufacturer's instructions. Some filters can be cleaned with vinegar, while others should only be rinsed with clean water or replaced entirely.
Replaced entirely ... clever, right? That's how they get you.
Frequently Asked Questions (FAQs)
Why should I use vinegar when cleaning my humidifier?
Vinegar is a powerful natural cleaning agent due to its acetic acid content. The acetic acid helps to break down the mineral deposits - often called scale or limescale - that accumulate in your humidifier over time. These deposits are naturally present in your water, especially calcium and magnesium. When water evaporates, these minerals stay behind (fun, right?).
The acetic acid found in vinegar then reacts with these mineral deposits through a chemical process called chelation. During this process, the acid molecules bind to the mineral particles, effectively dissolving them and making them easy to wash away. Removing said mineral buildup can help improve your humidifier's efficiency.
Vinegar is also antimicrobial. The acidic environment created by vinegar makes it difficult for bacteria and mold to survive and reproduce. Humidifiers can become cesspools of mold if not properly maintained, and no one in your house needs airborne mold particles.
How do I know if my humidifier needs cleaning?
As a general preventive measure, checking your humidifier's condition weekly helps you spot these signs early. Remember, it's much easier to remove fresh mineral deposits and prevent bacterial growth than to deal with heavy buildup and established colonies of microorganisms. Act today to prevent bigger problems down the line.
Visual Inspection
The first and most obvious way to know is via visual inspection. If you see white, gray, or pink crusty deposits forming on the surfaces, then you know it's time for a soak and a scrub. These deposits are mineral scale, similar to what you might see in your bathroom shower head. The white or gray deposits come from calcium and magnesium in your water, while pink discoloration often indicates the potential presence of some bacteria.
Misting Changes
A changes in cool mist output also lets you know your humidifier could use some TLC. When mineral deposits accumulate on the ultrasonic plate or heating element (depending on your humidifier type), they interfere with the device's ability to convert water into mist. You might notice the mist becoming weaker or inconsistent, similar to how a partially clogged shower head produces an uneven spray. If so, know that it's from a developing mineral layer.
Mechanical Noises
Unusual noises can also signal it's time for cleaning. A clean humidifier should operate relatively quietly, with perhaps a soft humming sound. If you start hearing clicking, crackling, or louder-than-usual operation, this often means mineral deposits are interfering with moving parts or the water's interaction with internal humidification mechanisms.
Unusual Smells
Pay attention to any unusual smells coming from your humidifier. A musty, earthy, or "wet dog" smell typically indicates mold or bacterial growth inside the unit. This happens because these microorganisms thrive in the warm, moist environment of an uncleaned humidifier. We've all grabbed that folded towel your kid left on the rack before and smelled that, right? That's what you're looking for.
External Buildup
One subtle but important sign is white dust forming on surfaces near your humidifier. This dust consists of mineral particles from your water being dispersed into the air along with the mist. While some mineral dust is normal, especially with harder water, an excessive amount suggests that mineral buildup inside the humidifier is being broken loose and distributed into your room.
How does water type affect cleaning?
Water type does affect how often you should cleanse the unit. If you use hard water (water with high mineral content), you'll need to clean more frequently than someone using soft or distilled water.